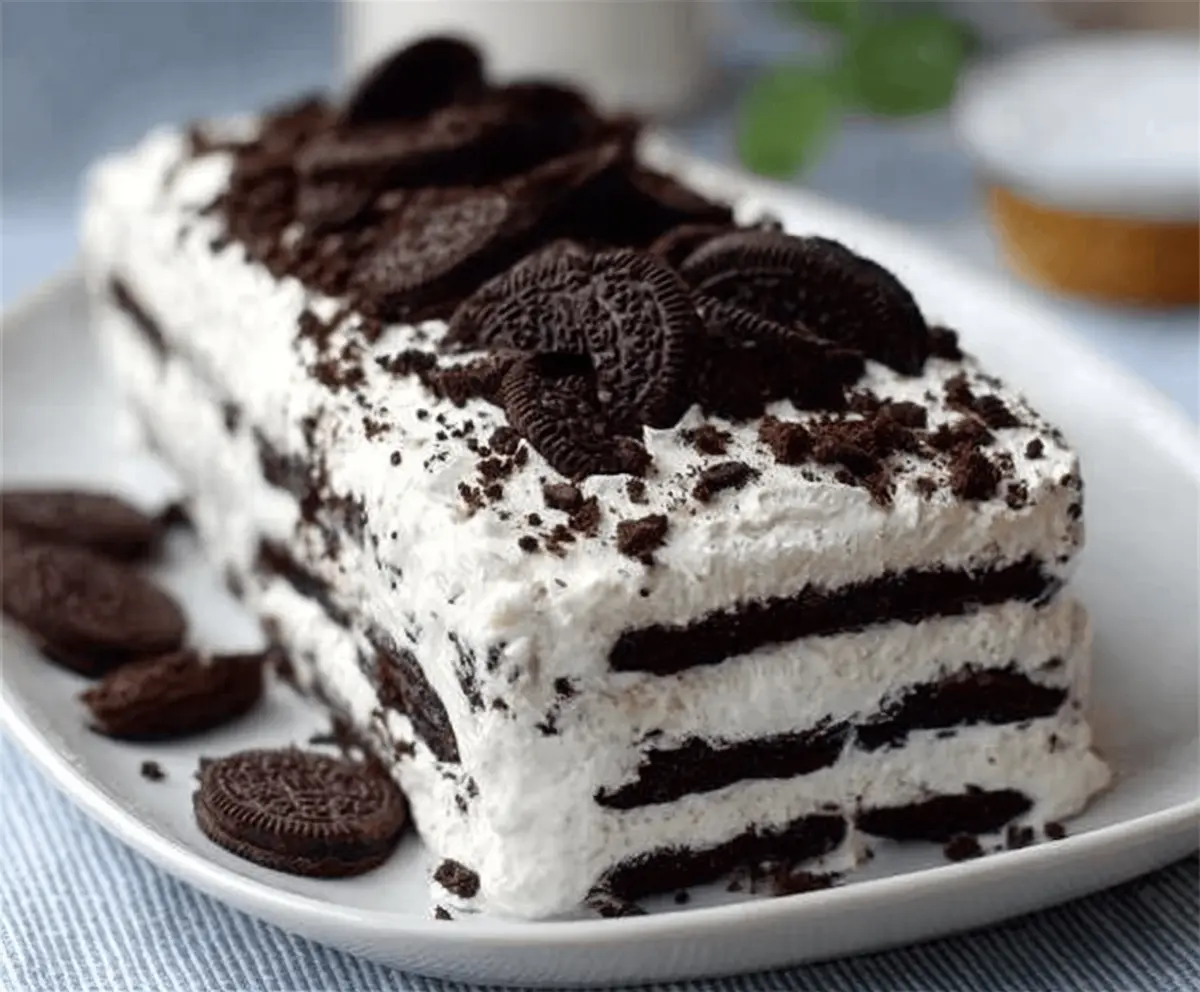
No Bake Oreo Icebox Cake is a fun and easy dessert that combines the crunch of Oreo cookies with creamy layers of whipped topping. It’s a no-fuss treat that doesn’t require baking, just some patience while it chills and sets into a rich, cookie-filled delight.
I love making this cake because it’s so simple and everyone always asks for seconds. The cookies soak up the cream just enough to get soft without losing their chocolatey bite, which makes every slice a perfect balance of textures. Plus, it’s great for days when you want something sweet but don’t want to turn on the oven.
My favorite way to serve this cake is straight from the fridge, maybe with a cold glass of milk or a scoop of vanilla ice cream on the side. It’s perfect for warm days or anytime you want a cool treat that’s a little bit playful and a whole lot tasty.
Key Ingredients & Substitutions
Oreo Cookies: Oreos are the star here, adding crunch and chocolate flavor. You can swap them for any chocolate sandwich cookie, or gluten-free versions if needed. For a twist, try mint or peanut butter Oreos!
Heavy Whipping Cream: This gives the cake its creamy texture. If you want a lighter option, use whipped coconut cream. It’s great for dairy-free diets and adds a subtle coconut flavor.
Powdered Sugar & Vanilla Extract: These add sweetness and flavor to the whipped cream. Powdered sugar dissolves nicely, but you can use honey or maple syrup as a natural sweetener. Vanilla extract boosts the richness.
Cocoa Powder & Chocolate Syrup (optional): These are for extra chocolatey decoration. If you don’t have cocoa powder, a light dusting of finely crushed Oreos also looks nice. Chocolate syrup can be replaced with melted chocolate chips drizzled on top.
How Do You Make the Whipped Cream Perfect for the Cake?
Whipping the cream well is key to getting the right texture. Here’s my tip for perfect stiff peaks without turning it into butter:
- Use a cold bowl and beaters, chill them in the fridge ahead of time for better whipping.
- Start whipping on medium speed until soft peaks form, then add sugar and vanilla.
- Increase speed and whip until stiff peaks form—when the cream holds its shape but is still smooth.
- Watch closely near the end to avoid overwhipping, or the cream will get grainy and start separating.
This whipped cream layers beautifully with the cookies and helps the cake set up nicely in the fridge.
Equipment You’ll Need
- Large mixing bowl – perfect for whipping the cream to soft, fluffy peaks.
- Electric hand mixer or stand mixer – makes whipping cream fast and smooth without tiring your arms.
- Loaf pan or rectangular dish – helps shape the cake neatly for easy slicing.
- Rubber spatula – great for folding and spreading whipped cream without breaking it down.
- Plastic wrap – to cover the cake while it chills and keeps it fresh in the fridge.
Flavor Variations & Add-Ins
- Use chocolate chip cookies instead of Oreos for a sweeter, less chocolaty bite.
- Mix in some chopped nuts or mini chocolate chips between layers for extra crunch.
- Add a layer of peanut butter or Nutella spread for a nutty twist that pairs well with chocolate.
- Stir a bit of instant coffee powder into the whipped cream for a mocha-flavored cake.
No Bake Oreo Icebox Cake
Ingredients You’ll Need:
For The Cake:
- 24 Oreo cookies
- 4 cups heavy whipping cream
- ½ cup powdered sugar
- 2 teaspoons vanilla extract
- 2 tablespoons cocoa powder (optional for dusting)
- Chocolate syrup or melted chocolate for drizzling (optional)
How Much Time Will You Need?
This no-bake cake takes about 15 minutes of active prep time. Then, you’ll need to chill it in the fridge for at least 4 hours, or better yet, overnight. This resting time lets the Oreos soften and the flavors blend perfectly, so plan ahead for the best results!
Step-by-Step Instructions:
1. Whip the Cream:
Start by pouring the cold heavy whipping cream into a large mixing bowl. Use an electric mixer to beat the cream on medium-high speed until it starts to thicken. Then add powdered sugar and vanilla extract. Keep whipping until stiff peaks form – that’s when the cream holds its shape firmly. Be careful not to overwhip or it will become grainy.
2. Layer the Cookies and Cream:
Grab a rectangular dish or loaf pan and spread a thin layer of whipped cream on the bottom. This helps stop the Oreos from sticking. Next, place a single layer of Oreo cookies over the cream. You can use whole cookies or break them into pieces—whichever you prefer. Spread a thick layer of whipped cream over the cookies, covering them nicely.
3. Repeat and Chill:
Keep alternating layers of Oreos and whipped cream until you run out or your dish is full. Finish with a top layer of whipped cream. For extra flair, sprinkle crumbled Oreos on top, drizzle with chocolate syrup or melted chocolate, and dust with cocoa powder if you’d like.
Cover the dish with plastic wrap and pop it in the fridge for at least 4 hours so the cake can set. When ready, slice into squares and serve chilled. Enjoy your creamy, dreamy no-bake Oreo icebox cake!
Can I Use Frozen Whipping Cream for This Recipe?
It’s best to use fresh, well-chilled heavy whipping cream. Freezing can change the texture and may prevent it from whipping properly. Chill your cream and mixing bowl in the fridge beforehand for the best results.
Can I Make the Cake Ahead of Time?
Absolutely! Prepare the cake a day ahead and refrigerate overnight. This allows the Oreos to soften and the flavors to meld perfectly, making it even more delicious the next day.
How Should I Store Leftovers?
Store leftovers covered tightly with plastic wrap or in an airtight container in the fridge. The cake stays fresh for about 2-3 days. For the best texture, enjoy it within this time frame.
What Can I Substitute for Oreos?
If you want a change, chocolate sandwich cookies or any crunchy chocolate cookies work well. Just make sure they’re sturdy enough to hold up when layered with whipped cream.