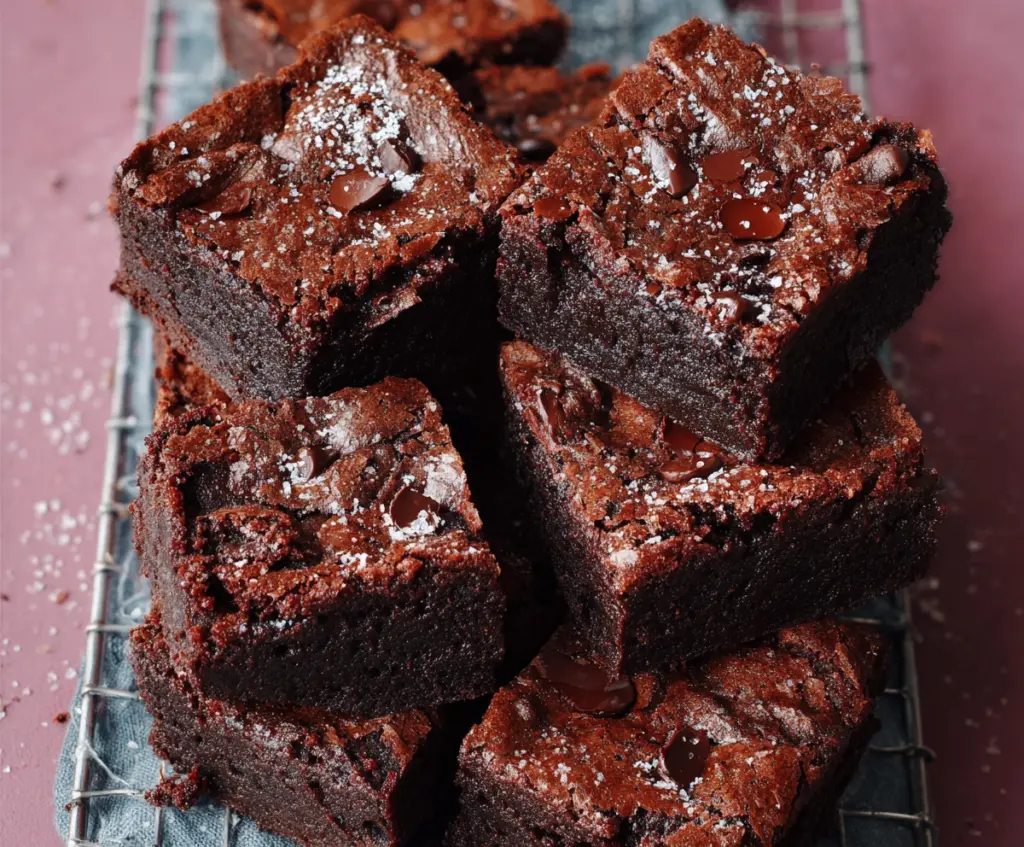
These Sourdough Discard Brownies are a fantastic way to turn something you might toss away into a delicious treat. They’re rich and chocolatey with a fudgy texture that’s just perfect for any brownie lover. What’s neat is that the sourdough discard adds a little extra depth of flavor without making the brownies taste sour, which makes them extra special.
I love making these brownies because they’re a great way to use up leftover sourdough discard that just sits in the fridge. It feels good to reduce waste and at the same time bake something everyone is excited to eat! Plus, the mix comes together really quickly, which means you can satisfy that chocolate craving without much fuss.
My favorite way to enjoy these brownies is still slightly warm with a scoop of vanilla ice cream on top. It turns a simple brownie into a little celebration. Whether it’s for a casual snack or sharing with friends, these brownies always bring smiles around the table, and I bet they will with you too!
Key Ingredients & Substitutions
Sourdough Discard: This is the star ingredient! It adds moisture and a mild tang without making the brownies sour. If you don’t have discard, you can substitute with yogurt or buttermilk for a similar effect.
Chocolate: I like bittersweet for richer flavor, but semisweet or even milk chocolate chips work too. Using both chopped bars and chips adds texture variety.
Butter: Unsalted is best to control saltiness, but you can swap with coconut oil for a dairy-free version. It’ll change the flavor slightly but still keep the fudgy texture.
Flour & Cocoa Powder: All-purpose flour works best to keep the brownies dense yet tender. You can try whole wheat flour for a nuttier taste but expect a denser brownie.
How Can I Tell When These Brownies Are Perfectly Baked?
Baking brownies just right can be tricky. Too long, and they dry out; too short, and they’re gooey too much. Here’s what I do to get that fudgy center and set edges:
- 30 minutes at 350°F is a good baseline.
- Check by inserting a toothpick in the middle—look for moist crumbs, not wet batter.
- Edges should pull away slightly from the pan, signaling they’re firm.
- Let brownies cool fully before slicing; they firm up as they rest.
This cool-down step is key! It helps you cut clean squares and enjoy that perfect texture.
Equipment You’ll Need
- 8×8-inch square baking pan – perfect size for thick brownies that bake evenly.
- Parchment paper – makes it super easy to lift out the brownies and clean up.
- Medium saucepan – melts butter and chocolate gently without burning.
- Mixing bowls – for combining wet and dry ingredients separately to keep things smooth.
- Whisk or spatula – helps mix the batter without overworking it.
- Toothpick or cake tester – ideal for checking doneness without cutting into brownies.
- Wire cooling rack – lets brownies cool evenly to get the best texture.
Flavor Variations & Add-Ins
- Add chopped nuts like walnuts or pecans for crunch and a slightly nutty flavor.
- Stir in a teaspoon of instant espresso powder to boost the chocolate flavor without adding coffee taste.
- Fold in dried cherries or cranberries for a sweet-tart contrast that pairs nicely with chocolate.
- Try swapping half the chocolate chips for white chocolate or peanut butter chips for a fun twist.
Sourdough Discard Brownies
Ingredients You’ll Need:
- 1/2 cup (115g) unsalted butter
- 4 oz (115g) bittersweet or semisweet chocolate, chopped (or chocolate chips)
- 3/4 cup (150g) granulated sugar
- 2 large eggs
- 1 teaspoon vanilla extract
- 1/2 cup (120g) sourdough discard (unfed or fed, room temperature)
- 1/4 cup (25g) unsweetened cocoa powder
- 1/2 cup (65g) all-purpose flour
- 1/4 teaspoon salt
- 1/2 cup (90g) chocolate chips or chunks (for mixing in and topping, optional)
- Powdered sugar for dusting (optional)
How Much Time Will You Need?
This recipe takes about 10 minutes of prep time and around 25 to 30 minutes to bake. Then, let the brownies cool for about 20 minutes before cutting and serving.
Step-by-Step Instructions:
1. Prepare Your Pan and Oven
Start by preheating your oven to 350°F (175°C). Line an 8×8-inch square baking pan with parchment paper or grease it well so the brownies don’t stick.
2. Melt Butter and Chocolate
In a medium saucepan over low heat, melt the butter and chopped chocolate together, stirring until smooth. Remove from heat and let it cool for a minute or two.
3. Mix Wet Ingredients
In a bowl, whisk the sugar, eggs, and vanilla extract until combined. Add in the sourdough discard and whisk again until smooth. Then, pour in the melted chocolate-butter mixture and stir until everything is combined well.
4. Combine Dry Ingredients
In a separate bowl, sift together the cocoa powder, flour, and salt. Gradually fold the dry ingredients into the wet mixture gently, taking care not to overmix.
5. Add Chocolate Chips
Fold half of the chocolate chips or chunks into the batter. Pour the batter into your prepared pan, smoothing the top with a spatula. Sprinkle the remaining chocolate chips on top for a lovely finish.
6. Bake and Cool
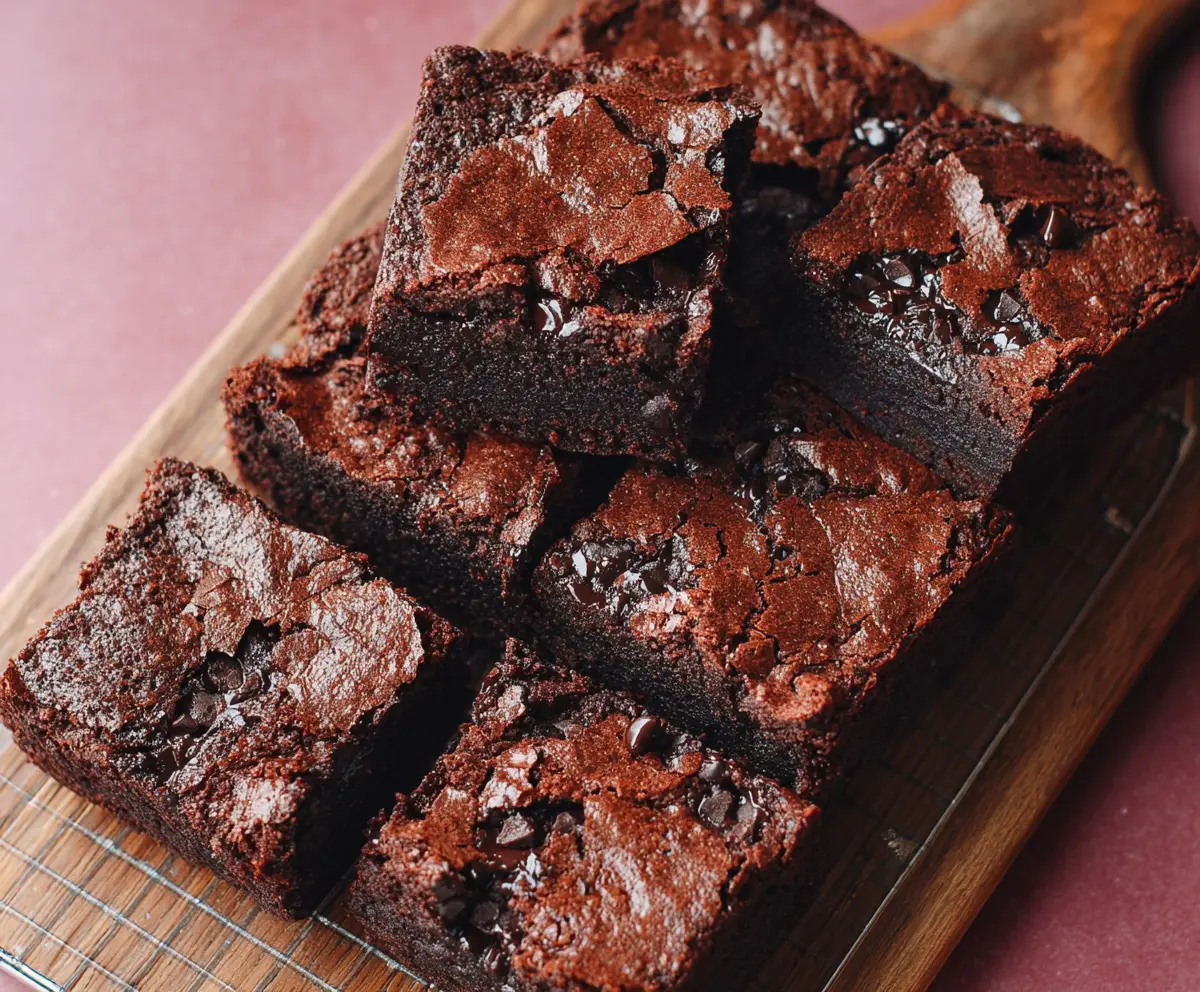
Bake for 25 to 30 minutes or until the edges are set and a toothpick inserted in the center comes out with a few moist crumbs. Once baked, let the brownies cool completely on a wire rack before cutting into squares. Dust with powdered sugar if you like!
Enjoy your rich and fudgy Sourdough Discard Brownies – a perfect treat made from something extra special!
Can I Use Frozen Sourdough Discard for These Brownies?
Yes! Just thaw the discard in the fridge overnight or at room temperature until fully thawed before using. Make sure it’s smooth and at room temperature for best mixing.
Can I Substitute Sourdough Discard with Yogurt or Buttermilk?
Absolutely! Replace the discard with an equal amount of plain yogurt or buttermilk to keep the moisture and tender crumb in the brownies.
How Should I Store Leftover Brownies?
Store any leftovers in an airtight container at room temperature for up to 3 days or in the fridge for up to a week. You can warm them slightly before serving for that fresh-baked feel.
Can I Add Nuts or Other Mix-Ins?
Definitely! Walnuts, pecans, or dried fruit like cherries or cranberries work great. Just fold them in with the chocolate chips before baking.